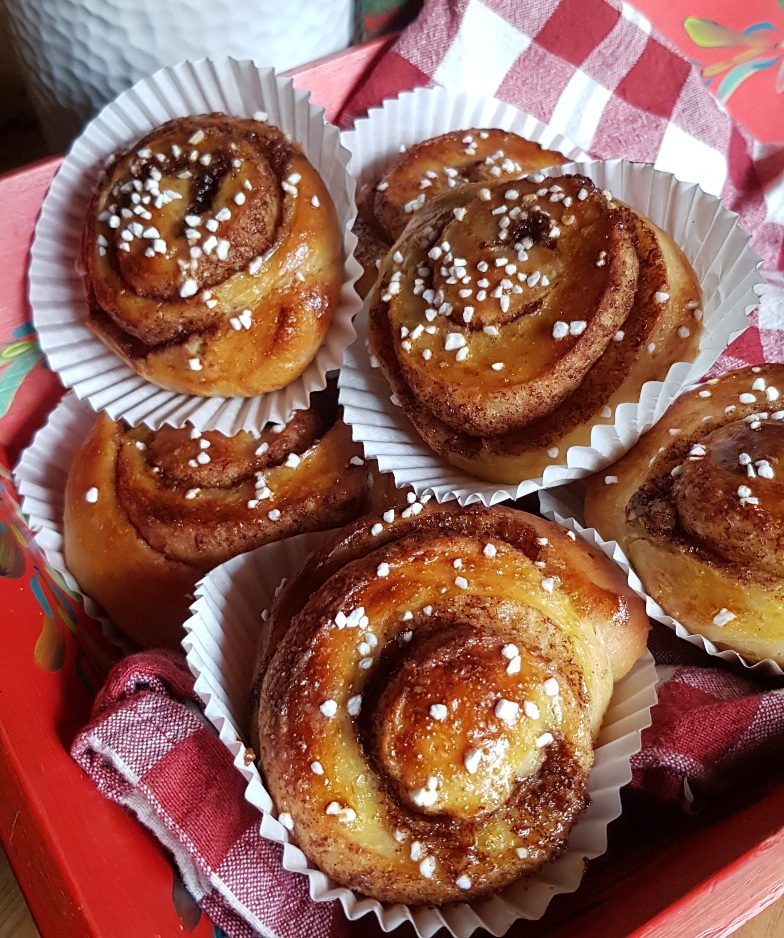
Waking up to the prospect of a tummy full of warm, freshly-baked cinnamon buns surely has to be one of the highlights of a cold Sunday morning. These fabulously sticky, fragrant rolls are not only easy to make ahead, but can be popped in the freezer and baked when needed, making them an invaluable part of your Very Organised Christmas.
This recipe will make roughly 24 buns; as they are best eaten warm from the oven, I tend to put half in the fridge overnight for breakfast the next morning, and freeze the rest on a baking sheet lined with greaseproof paper. Once they are frozen solid, pack them into ziplock bags and put them back in the freezer, where they will keep happily for up to a month; allow to defrost overnight in the fridge, and then prove and bake as usual.
The time taken for the dough to rise for the first time is very temperature dependent. In summer, I have had the mixture double in size in an hour and a half, but in winter it can take twice this so it is best to complete this stage in the fairly early evening so it doesn’t interfere with your bedtime.
Ingredients
For the dough
10 cardamom pods
2 sachets of fast-action dried yeast (14g)
200ml milk
50g butter, roughly chopped into cubes
2 eggs
¼ teaspoon salt
500g plain flour
For the filling
125g butter, softened
75g brown sugar
75g caster sugar
1 tablespoon ground cinnamon
For the glaze
1 egg, beaten
Pearl sugar (Smashed up sugar cubes will work if you cannot source any pearl sugar, which are larger granules than usual that retain their shape when baked)
- Ground cardamom can lose its potency very quickly so it is preferable to use the pods. Crush them in a pestle and mortar (or bash them with the end of a rolling pin).
- Place the pods and their seeds in a small pan with the milk and butter and warm over a low heat until the milk is just about steaming. Remove from the stove and swirl around until the butter has melted.
- To make the dough, combine the flour, yeast and salt in a large bowl, or in your kitchen mixer, fitted with a dough hook.
- Make a well in the centre of the bowl, then strain the milk mixture over the flour, discarding the cardamom pods.
- Add the eggs and mix to combine. Knead the dough either by hand or in your kitchen mixer with a dough hook fitted. It will be quite sticky, but don’t be tempted to add any extra flour at this stage as it will make the buns dry. By hand it will probably take about ten minutes to achieve a smooth and bouncy dough, and about five minutes in the mixer.
- Rub a thin layer of oil over a clean bowl, shape your dough into a ball and leave it to rest, nicely nestled and covered with a sheet of cling film ( I have an elderly hotel shower cap which suits the purpose admirably). Prove until it has doubled in size and pings back nicely when you prod it.
- Meanwhile, line two roasting tins with greaseproof paper, then mix the filling ingredients in a small bowl until thoroughly combined.
- Once your dough has risen to your satisfaction, roll it out into an oblong roughly 50 x 30cms, with the long edge facing towards you.
- Using the back of a large spoon, smear the doughy rectangle with the buttery, crunchy filling, taking care to push it right to the edges (nobody wants a dry bit).
- Starting with the long edge, roll the dough up into a sausage. At this stage you can either cut it with a sharp knife into 2cm slices, or, my preferred method, using baker’s twine or strong thread (you can even use unwaxed dental floss). Pass the thread under the sausage at about 2cms in, then pull the furthest end towards you and the nearest one away, thus hopefully cutting the snails neatly.
- Lay them into your prepared tins with the whirly sides facing up (discard the very ends of the sausage, or bake them separately for private consumption), then cover tightly with cling film and pop them in the fridge overnight (or straight into the freezer).
- To bake the buns, remove them from the fridge and allow them to rise a second time for 1-2 hours. Once they have puffed up again, brush them with beaten egg, sprinkle with pearl sugar and place in paper muffin cases.
- Preheat the oven to 180 degrees. Bake for 8-12 minutes until golden brown; they tend to catch quite easily, so check them every minute or so in the final stages.
- I find them sweet enough already, but if you would like to make an icing, simply mix 3 tablespoons of milk and 150g of icing sugar together (adding a little more liquid if necessary) to make a runny icing about the consistency of single cream. Allow the buns to cool slightly, then drizzle over the top with a fork.


