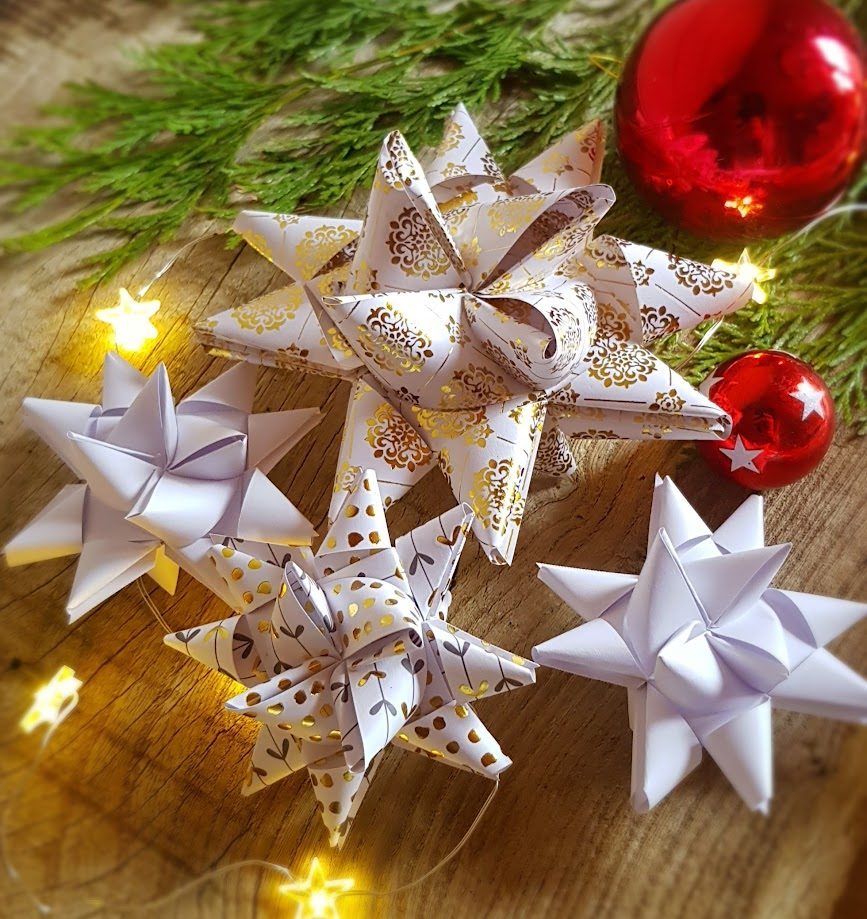
What are julestjerner, I hear you ask? Also known as Moravian stars. Julestjerner, or Danish paper woven stars, are one of the most iconic of Scandinavian Christmas ornaments, and are very easy to make once you have got the knack; they make the perfect activity for a traditional Danish hygge paper craft evening with your friends and family. They look wonderful piled up in bowls with a few fairy lights, strewn across your Christmas table, hung on the tree or strung together to make a lovely mobile. We hang a branch from the ceiling and suspend the stars and a few fairy lights from the twigs for an alternative rustic decoration!

Bex’s grandmother taught her to make julestjerner when she was little, and there are a couple of tricks that make folding them SO much easier. Snip the ends off the strips before you start weaving, as it will make the paper slip through the holes, then if the end starts getting bent and ragged, just snip off a little more. If you have never made them, start with the wider strips too, before moving on to the narrower ones as the smaller stars are fiddlier; if your eyesight is good enough you can even make them out of curling ribbon.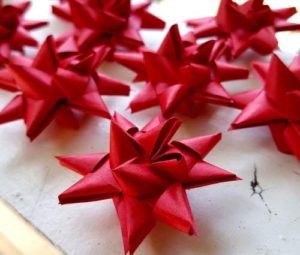

Here at Hyggestyle we have everything you need to get started weaving and folding Danish stars, baskets and paper sweetie cones. All our kits come with full instructions, and if you do get stuck, drop us a line and we will do our best to help… and while you are feeling in the festive spirit, try our fabulous Christmas market nuts recipe, Danish brunkager biscuits, the Hyggestyle Christmas Family Quiz or our print out and colour in Danish elves!
Watch a two minute video on now to make Danish paper stars here…
- To make the paper stars, fold your strips in half lengthways if they are not already, and snip the ends off at an angle.
- To make the first star, take four strips and alternately weave them inside and outside the adjacent strip to form a square.
- Pull the strips so the square closes up.
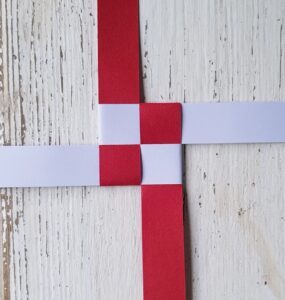
- Lay your strips out so one is pointing up at the left hand side. Fold the top layer down.
- Repeat with the other three strips, working anti-clockwise.
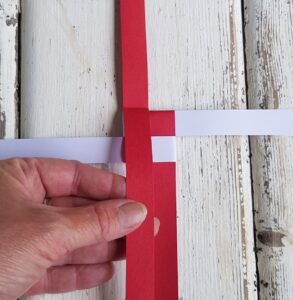
- Take the fourth strip and tuck it into the hole made by the first strip.
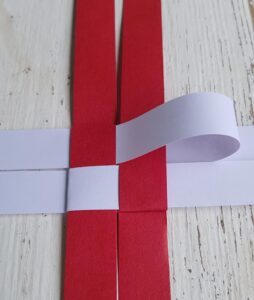
- Take the top right strip and bend it away from you, folding it into a triangle.
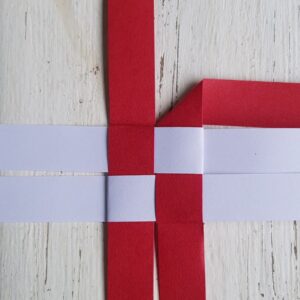
- Now bend the strip towards you, up and away from you and back down through the hole by the triangle.
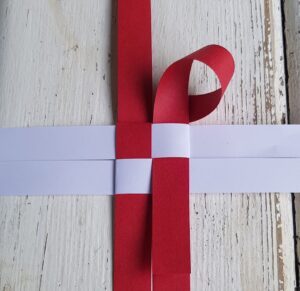
- Pull the end gently until it forms a point. These are probably the hardest manoeuvres but once you have mastered them successfully the rest of the star will be a breeze.
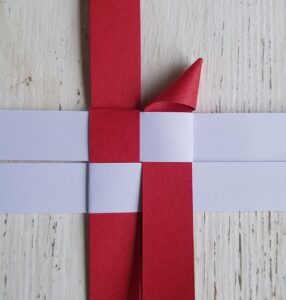
- Keep turning the star 90 degrees to the right and repeating this fold until all the right hand strips have been made into points.
- Turn the star over and repeat until all the (new) right hand strips have been folded. You should now have eight external points on your star.
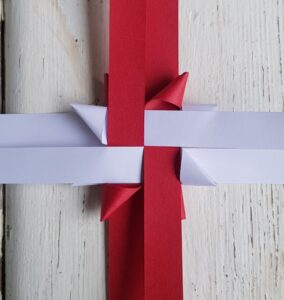
- Now we are going to make the internal points (the working ends of your strips should now have moved to the centre). Lift up the bottom right hand strip.
- Twist it down and to the right, to make a triangle.
- Moving the white working strip above it out of the way, take the end and loop it up and over, pushing it through the hole created under the white strip.
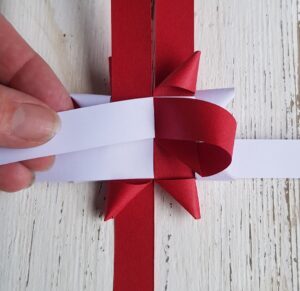
- The tip should come out of the top star point to the left. Pull gently until it forms a point.
- Repeat with the other three strips until you have four points.
- Turn the star over and repeat with the last four strips to make four more points.
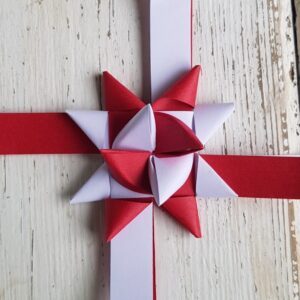
- Snip off the excess working length where it comes through the external points.
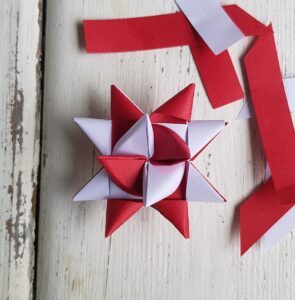
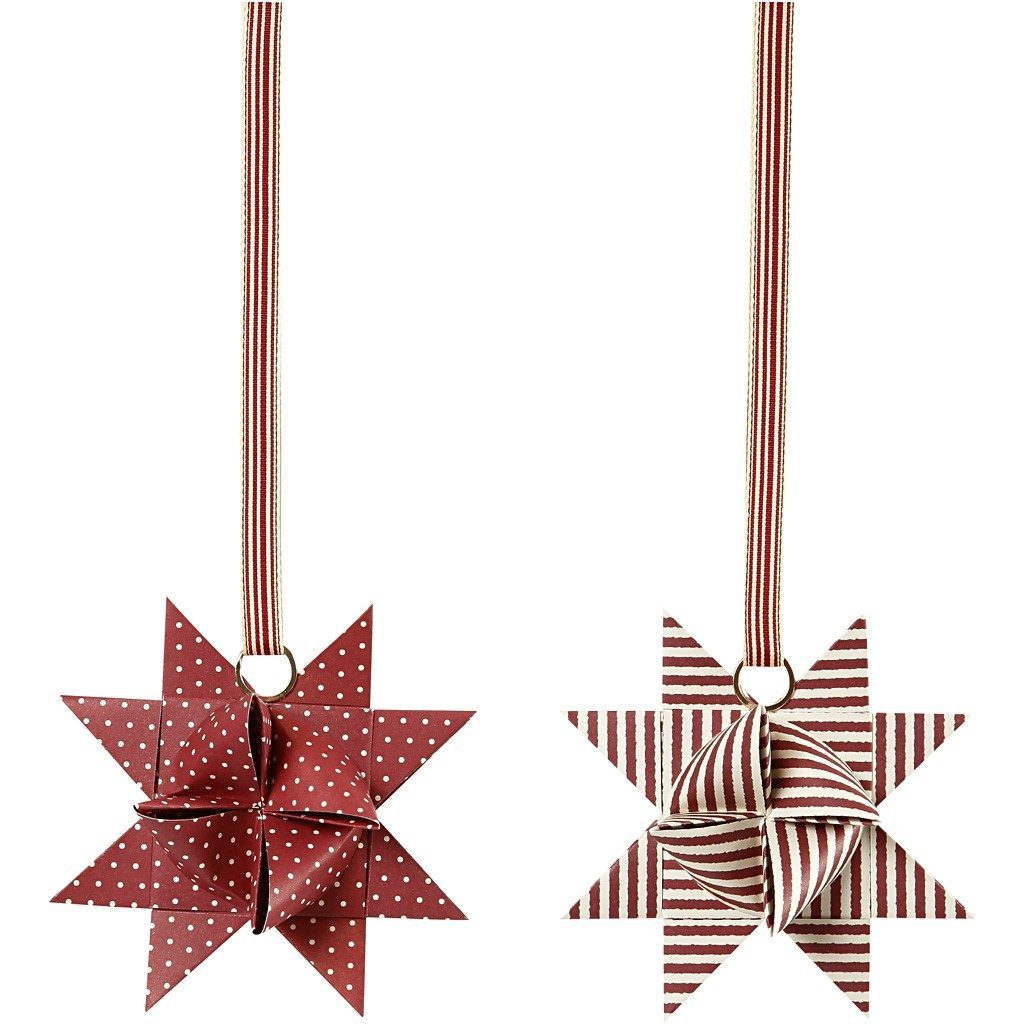
Danish woven paper Christmas star strips (stjernestrimler) in classic red by Vivi Gade Copenhagen
Also known as Moravian or Froebel stars, these Danish paper stars are easily made from our kit containing double sided paper strips, for maximum creativity!
An essential decoration on any Scandinavian Christmas tree, the folded paper stars also look wonderful hung in clusters by windows, or strung on a mobile. Full instructions on how …
£5.99

